Let’s Talk Poo 8 (Week 2 of Prep Diet + First Infusion!)
Today we finished week 2 of the prep diet. I wish I could say I’d found more really delicious recipes, but this week was a lot of “Meh”. We have two more weeks of our high fiber diet to go (Ashley will continue from here out) while the infusions take place.
Today, Ashley did a colon cleanse using MiraLax in the same way it’s prescribed before a colonoscopy. We used Mango Peach Crystal Light liquid drink mix for flavor. Ashley said it totally eliminated the flavor of the Miralax. She opted to start the cleanse this morning and ‘get it over with’. Lucky us, by evening time Lee had a donation! We did some research and found that MiraLax stops working about 2 hours after the last drink. We waited a few extra hours to be sure (Lee can poo on demand, how lucky are we?!).
WARNING: GRAPHIC DESCRIPTIONS AHEAD
Ok folks. You’ve been warned. It will start getting graphic from this point forward. The intent is to educate and hopefully answer those questions you have but aren’t sure who or how to ask.
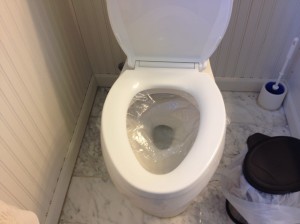
When Ashley was ready for her infusion, Lee took to the bathroom with a sheet of Seran wrap. Seran wrap hanging low within the toilet bowl is, in his opinion, the easiest way to catch a deuce.
Once he’d collected his sample, he followed the instructions for the Home FMT How-To with one exception. HE DID NOT AUTOMATICALLY ADD 8OZ OF WATER to his sample. That would have been too much. The water to poo ratio has to be such that you have the consistency of paint or milkshake. This can vary depending on the size of your sample. Our suggestion? Mix it for a quick burst in the blender and then carefully add small amounts of water until the consistency is right. Try to minimize the number of blends so as to not add too much oxygen to the mix. Remember, those happy little gut bugs are anaerobic and don’t much like oxygen!
An addition we made was having a bucket of soapy hot water (with antibacterial dish soap) ready to go. After items were rinsed over the toilet, per the instructions, they were then dropped into the bucket of hot soapy water.
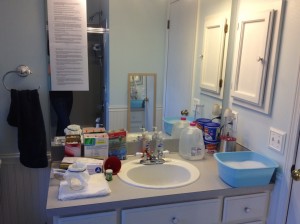
Below are some photos of our set up. We used sleeping bags and comforters underneath the foot end of Ashley’s bed to give it a good tilt for her to lie down on. We also put down a disposable absorbent underpad like they have in the hospital just in case, but in the end, it was never needed.
 |
 |
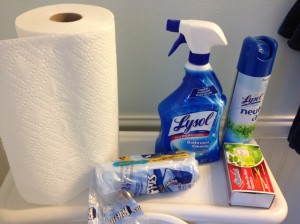
| You can find the supplies list in Home FMT How-To. We also purchased a wire mesh strainer as an alternative to the cheesecloth, but so far cheesecloth seems superior. We also taped the step by step instructions to the mirror, for easy access. | Antibacterial spray, neutra-air plus matches for clearing the air. Scented garbage bags for our step garbage can. |
Our first infusion amount was small, and more the consistency of cream (not quite paint). We only managed to get 1 fleet enema bottle worth. Lee handed it off to Ashley.
Ashley described her infusion as “lying on the floor with my backside up in the air, and then I infused”. There is a photo on the enema box that shows what I think she was describing. Ah, to be young and limber.
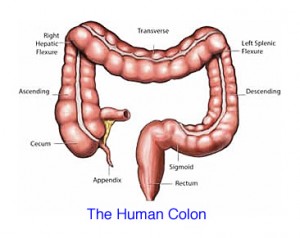
Once the infusion was in, she followed the instructions from the CCD. She started with lying on her left side, with her backside elevated. She turned to her right side after 15 minutes and then repeated left and right again for 15 mins each. She also hung over the side of the bed and twisted slowly between her right and left, working hard to try and move the solution throughout her colon.
After an hour, Ashley rushed downstairs to eat some food and take her 4 pills of Bioplex Intensive Care (recommended by Dr. Stephanie to feed the new bacteria).
At the time of this writing, Ashley had held her infusion for 3.5 hours. She is aiming to hold it all night, realizing that this first infusion, with a completely clear colon, is our best shot at getting a good foot hold. She said she had a very mild cramping for a short time that was barely worth mentioning. So far, no other effects. She’s in good spirits and feeling a little cabin fever already.
COSTS TO DATE:
| Note: We are self-insured with a high deductible policy ($2500). Your out of pocket costs could vary based on your insurance coverage, doctors and testing facilities as well as the region you live in. |
| Item | Actual Cost | Amount Paid |
|---|---|---|
| Doctor’s visit | $145.00 | $0 (insurance covered) |
| Blood and Urine Tests | $1019.50 | $331.24 (after insurance discounts) |
| Stool Testing | $454.71 | $454.71 (no insurance discounts) |
| Supplies | $94.16 | $94.16 |
| Follow up Doctor’s Visit | $145.00 | $0 (insurance covered) |
| Enema bottles, heating pad, Probioplex | $97.16 | $97.16 |
| More Enema bottles, hospital pads, gloves | $49.68 | $49.68 |
| Totals: | $1860.21 | $1026.95 |

Disclaimer
The medical information on this site is provided as an information resource only, and is not to be used or relied on for any diagnostic or treatment purposes. This information is not intended to be patient education and should not be used as a substitute for professional diagnosis and treatment.
Please consult your health care provider before making any healthcare decisions or for guidance about a specific medical conditions and treatments. Glimpses of Me expressly disclaims responsibility, and shall have no liability, for any damages, loss, injury, or liability whatsoever suffered as a result of your reliance on the information contained in this site. Glimpses of Me does not endorse specifically any test, treatment, or procedure mentioned on the site.
*Names have been changed for privacy


